How to Fix iPad 4 unknown Error(9) When I Rooted by iTunes
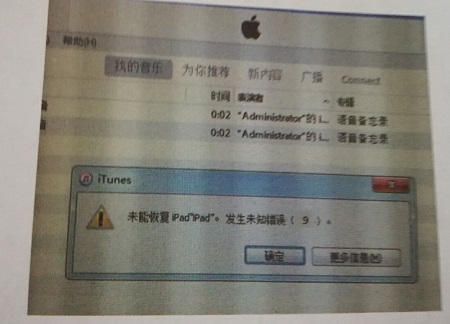
When you try to restore the iOS firmware the iTunes error code (9) appears in iTunes. The error message often displays as "the iPhone/iPad cannot be restored: Unknown error occurred(9)." This can be a real problem especially when you done know why it is happening or what to do about it.
In this article, vipfix is going to address the iTunes error (9), what it is and how to fix it. Let's first begin with what it is and why it happens.(1-1)
Fix Process:
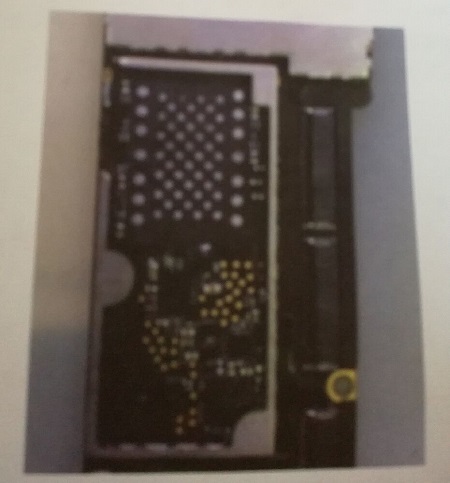
1. Judging from my repair experience, if it reports unknown error (9), NAND FLASH power supply or NAND FLASH itself is damaged. First measure each power supply of NAND FLASH. They are normal. Next, remove NAND FLASH and deal with the solder tin and black glue, as shown in picture 1-2.
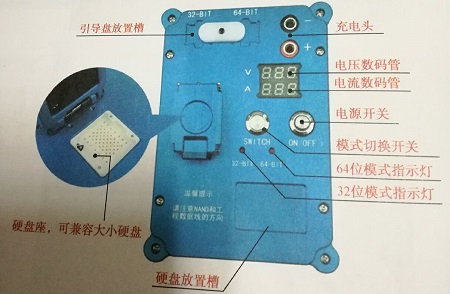
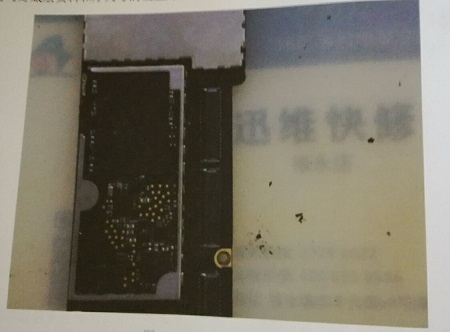
2. Assemble the removed NAND FLASH on a workable motherboard to root. It still reports unknown error (9). I can be sure that the NAND FLASH is faulty. Put new NAND FLASH on NAND FLASH testing jig to find out the information and series number. The software operation interface of NAND test fixture is shown in picture 1-3. Then solder the NAND FLASH with information and series number and on motherboard, as shown in picture 1-4.
3. Connect computer to root, as shown in picture 1-5.
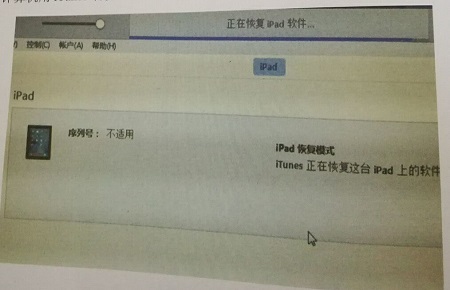
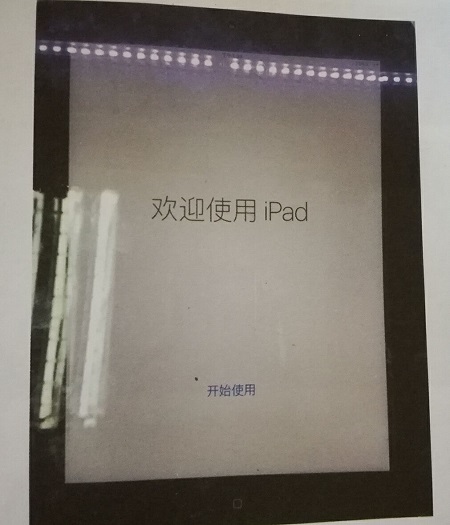
4. It is activated and gets into IOS system normally, as shown in picture 1-6. Test all the functions. They are normal. Trouble is removed.
In this article, vipfix is going to address the iTunes error (9), what it is and how to fix it. Let's first begin with what it is and why it happens.(1-1)

Fix Process:
1. Judging from my repair experience, if it reports unknown error (9), NAND FLASH power supply or NAND FLASH itself is damaged. First measure each power supply of NAND FLASH. They are normal. Next, remove NAND FLASH and deal with the solder tin and black glue, as shown in picture 1-2.

2. Assemble the removed NAND FLASH on a workable motherboard to root. It still reports unknown error (9). I can be sure that the NAND FLASH is faulty. Put new NAND FLASH on NAND FLASH testing jig to find out the information and series number. The software operation interface of NAND test fixture is shown in picture 1-3. Then solder the NAND FLASH with information and series number and on motherboard, as shown in picture 1-4.


3. Connect computer to root, as shown in picture 1-5.

4. It is activated and gets into IOS system normally, as shown in picture 1-6. Test all the functions. They are normal. Trouble is removed.


评论
发表评论