iPad Air 2 Motherboard Burned and won' t Turn on
A customer said the iPad Air got in some water from the charge interface, it cannot be turned on. It could not be sent to Apple store to fix because the water damage is out of warranty. Here is what you can do if your iPad will not turn on or is unresponsive (dead), meaning nothing shows up on the screen (black screen). Now vipfix will help you to solve this problem that is the iPad Air' s trouble phenomenon is iPad Air 2 cannot be turned on after water gets in and the motherboard is burned and badly eroded.
Repair Process:
1. After tearing it down, I find that the screen interface is burned badly and is eroded, as shown in picture 1-1.
2. The LCD cable interface has been burned, as shown in picture 1-2.
3. First, replace brand new LCD FPC connector Socket and assemble it to normal iPad to test. Luckily, the screen is tested to be workable. Next, fix the motherboard. After cleaning motherboard, some components are missing and some solder pads are burned. After making up the missing components, measure the diode data of LCD interface. Backlight power supply circuit PPLED_BACK_REG_A has no data. Checking the circuit diagram, I know that PPLED_BACK_REG_A runs through a inductor and connects diode D8428, as shown in picture 1-3.
3. Find D8428 (in picture 1-4) in bitmap and jump a wire from the negative pole of diode to LCD interface, as shown in picture 1-5.
4. Next, we continue to deal with the eroded circuits connected to pin 15. After checking the circuit diagram, I know that this pin is a 1.825V power supply PP1V825_S2R_MESA_FILT on fingerprint chip. The number of the chip that generates the voltage is U4750. It is mouldy and eroded. Its solder pad is dropped and cannot be soldered again. The circuit diagram of U4750 is shown in picture 1-6.
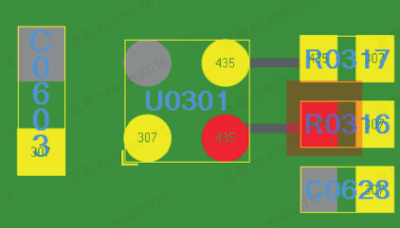
5. Since I cannot solder the chip, I have to borrow a 1.8V power supply from other places. After checking the circuit diagram, I find that the nearest 1.8V power supply is PP1V8_AUDIO of U3250 audio amplifier chip, so jump a wire from C3252. Then assemble the screen and turn it on to test. All the functions as well as the fingerprint function are normal. The circuit diagram of C3252 is shown in picture 1-7.


评论
发表评论